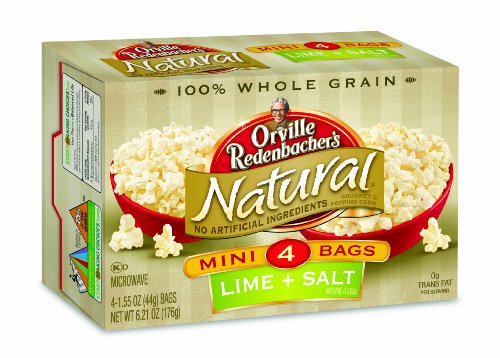
Guys! Remember this post? About the lime popcorn? Of course you don't, but I do, and I figured out an alternative!
True Lime powder!
Here's the story. I was at Target, probably buying a bunch of stuff I don't need, when I happened upon this microwave popcorn bowl. It was on clearance, so of course it went straight in the cart, along with a package of loose-kernel popcorn. A bit further down the aisle, a box of True Lime caught my eye, and then something happened: a giant lightbulb went on over my head, the skies opened up, and angels sang. "DUH!" they cried out in their heavenly harmonies, "THIS IS THE OBVIOUS SOLUTION."
I put a little oil (sometimes coconut oil, sometimes a mysterious product called "popcorn oil" that will probably give me cancer of the eyeballs but at least I'm trying to avoid "popcorn lung" [see original lime popcorn post]) in the popcorn bowl, add 1/3 cup kernels, and pop that bad boy in the microwave for about 3 minutes (sometimes takes less time; remove when there are 1-2 seconds in between pops). Be careful, the bowl will be hot! Also, make sure you use the lid; one time I forgot and had to clean Popcorn Armageddon out of my microwave.
After it's popped, sprinkle a packet or two of True Lime over the whole shebang, and a sprinkling of kosher salt if you like. It's just as good as, or perhaps better than, the store-bought lime popcorn. Now that it's accessible to me, I fiend for this stuff day and night. Give it a try and let me know what you think!
Showing posts with label DIY. Show all posts
Saturday, September 22, 2012
Sunday, January 2, 2011
Wow! I tripped and fell into a time machine.
I have no idea what happened to December, or how it's possible that it's 2011, but I do know that it's going to be hard for me to take down my 2010 YEAR IN KITTENS calendar. I mean, I'm going to pull through, but it won't be easy.
What's that? You want to know what I've been up to? Let me explain! (I feel so good about myself that I was finally able to work my blog title into an entry.)
First, I made some mineral makeup. I ordered a kit from Brambleberry, and it was a bit confusing, to be honest with you. The instruction manual was just a generic one that they send out with all their products, not specific to the actual kit itself, so I had some screwups before I got it right. This is what it ended up looking like:
Something else that happened is that it got cold outside. So I've been spending a lot of time in the basement tending/staying warm by the woodstove.
And by staying warm, I mean sweating like I have never sweated before because it gets ridiculously hot in that room. It was the middle of December and I was sprawled out in a tank top and gym shorts, spritzing myself with water while watching Cloudy with a Chance of Meatballs. The nice thing about it is that it gives me a chance to catch up on shows that are available on Netflix streaming, and to work on crafts!
While all this was going on, some electricians came and changed out the light fixtures in my bathroom. It would've been a DIY project except for apparently the people who built our house were heavy drinkers, and the wiring was a hot mess. But the lights look much better now!
We also ripped out the wall in the middle of the bathroom, and my dad and I installed a new floor, which was a project beset with many, many challenges. It should've taken two days, max, but it took us a week. Here is an awful cameraphone picture of what the new floor looks like.
The bathroom project is in no way complete, but we're getting closer. This is probably the single biggest reason I haven't been posting very much (a.k.a. have not been posting at all).
In fun project news, I decided I wanted to build something, so my dad and I (so much father-daughter togetherness this past month) built some storage cubes from a plan I found on Ana-white.com. Of course, since my dad is an amateur woodworker and I am a total newbie, they probably aren't very good. There are lots of splinters and nails sticking out and unevenly-cut boards. But who cares? It was fun, and they'll be useful (if I ever get off my butt to prime and paint them).
I also made lotion! I found the instructions here. I already had a bunch of stuff so the only thing I had to order was the emulsifying wax. Here's what it looked like when I was done:
One day I drew a bunch of stuff with giant teeth.
That's basically it I guess. Hopefully I'll be back with more regularly scheduled content for the 0 people who read this. Bye!
What's that? You want to know what I've been up to? Let me explain! (I feel so good about myself that I was finally able to work my blog title into an entry.)
First, I made some mineral makeup. I ordered a kit from Brambleberry, and it was a bit confusing, to be honest with you. The instruction manual was just a generic one that they send out with all their products, not specific to the actual kit itself, so I had some screwups before I got it right. This is what it ended up looking like:
It works pretty well, and it came with a nice kabuki brush, so that was pretty cool. It's a little bit dark for my skin tone, but it's not too noticeable and maybe it'll be a better match in the summer months.
Something else that happened is that it got cold outside. So I've been spending a lot of time in the basement tending/staying warm by the woodstove.
And by staying warm, I mean sweating like I have never sweated before because it gets ridiculously hot in that room. It was the middle of December and I was sprawled out in a tank top and gym shorts, spritzing myself with water while watching Cloudy with a Chance of Meatballs. The nice thing about it is that it gives me a chance to catch up on shows that are available on Netflix streaming, and to work on crafts!
![]() |
| I have no idea what I'm doing. |
| Before. You can kind of see the old lights and where one of them was ripped out. |
![]() |
| After. Ignore all the crappy holes and marks on the walls. |
The bathroom project is in no way complete, but we're getting closer. This is probably the single biggest reason I haven't been posting very much (a.k.a. have not been posting at all).
In fun project news, I decided I wanted to build something, so my dad and I (so much father-daughter togetherness this past month) built some storage cubes from a plan I found on Ana-white.com. Of course, since my dad is an amateur woodworker and I am a total newbie, they probably aren't very good. There are lots of splinters and nails sticking out and unevenly-cut boards. But who cares? It was fun, and they'll be useful (if I ever get off my butt to prime and paint them).
![]() |
| Without doors. |
![]() |
| With doors. |
One day I drew a bunch of stuff with giant teeth.
That's basically it I guess. Hopefully I'll be back with more regularly scheduled content for the 0 people who read this. Bye!
Labels:
DIY,
drawing,
frugal,
home,
lotion,
makeup,
projects,
terrible art,
woodworking
Wednesday, November 10, 2010
In Search of a Substitute: Orville Redenbacher's Lime and Salt Popcorn
Somebody call Dr. Drew, because I have an addiction to Lime and Salt Popcorn. I've been hooked since my first bag, and then it disappeared and I was distraught and hoarded my remaining supply. A couple of weeks ago I was in the grocery store when a single shaft of light shone down from the heavens and I saw, to my ecstatic surprise, that it was BACK! AND I BOUGHT FOUR BOXES! OOPS!
According to Wikipedia, which we all know is the world's most reliable source of information, popcorn from the store-bought microwave bags is... how do you say... not so good for you.
"POPCORN LUNG?" That ain't right, you guys. I have to figure out how to replicate this delicious flavor on my own, so that "popcorn" and "lung" may never again be in the same sentence, unless it is to say "I inhaled the delicious, non-toxic popcorn scent into my lungs before eating the entire bag by myself. The end."
I get that you can make plain popcorn kernels in plain paper bags in the microwave, and you can make them on the stovetop, and then you can add your own flavorings. It's up to me now to figure out what process and what ingredients will most closely resemble Mr. Redenbacher's wretchedly glorious creation. Perhaps items from this site could be of help. In the meantime, let's hope I don't crumble and die from eating the 4 boxes I already bought. Because I will do it.
UPDATE: I figured out how to do it myself!
| Tasty, tasty poison. |
According to Wikipedia, which we all know is the world's most reliable source of information, popcorn from the store-bought microwave bags is... how do you say... not so good for you.
In 2006, concerns were raised about the levels of perfluorooctanoic acid (PFOA, a chemical related to Teflon) in popcorn bags. The high temperatures used in popping popcorn may facilitate the transfer of the chemical, which is carcinogenic in lab animals, into the popcorn oil.DuPont has agreed to eliminate almost all use of the chemical by 2015.
Additionally, the artificial butter flavoring used in many brands of microwave popcorn has been linked with the obstructive lung diseasebronchiolitis obliterans, sometimes referred to as "popcorn lung", in factory workers and others exposed to large amounts of the substance. The chemical diacetyl, the cause of bronchiolitis obliterans, has been removed from some popcorn brands.
"POPCORN LUNG?" That ain't right, you guys. I have to figure out how to replicate this delicious flavor on my own, so that "popcorn" and "lung" may never again be in the same sentence, unless it is to say "I inhaled the delicious, non-toxic popcorn scent into my lungs before eating the entire bag by myself. The end."
I get that you can make plain popcorn kernels in plain paper bags in the microwave, and you can make them on the stovetop, and then you can add your own flavorings. It's up to me now to figure out what process and what ingredients will most closely resemble Mr. Redenbacher's wretchedly glorious creation. Perhaps items from this site could be of help. In the meantime, let's hope I don't crumble and die from eating the 4 boxes I already bought. Because I will do it.
UPDATE: I figured out how to do it myself!
Tuesday, November 9, 2010
On my Mind in November
I can't stop thinking about:
- Making my own mineral makeup. I found a kit here that seems like it would be fairly economical. This one also looks pretty good.
- NaNoWriMo and my perpetual failure to participate. I am extremely bad at coming up with storylines but I think it would be fun to try. Maybe next year. Or the year after that.
- Establishing a day to start vegetarian freezer cooking so I can stop going out for lunch so often (two or three times a week). I have this sweet/super nerdy stainless steel lunch container that I want to use so bad.
Labels:
cooking,
deep thoughts,
DIY,
ideas,
makeup,
vegetarian,
writing
Monday, November 8, 2010
Successful Experiment: Oil Cleansing Method
I first learned about the oil cleansing method (OCM) from general internet wanderings a few years ago. I was pretty skeptical, and also had no idea where to obtain the oils that are usually used in oil cleansing blends. This past winter, I was so sick of how dry my skin was that I decided to cowboy up and order some oils online (from Mountain Rose Herbs, to be specific) and give it a go.
The logic behind the method is that your face produces oils for a reason, and so it makes no sense to completely strip all of those oils away and then try to replace the natural oil-based moisture with a water-based moisturizer. Traditional, commercial face-washes and astringents and acne treatments can be incredibly harsh on the skin, and operate on the principle that "oil is bad." Too much oil sitting on your face all the time isn't ideal, but oil in and of itself is good for your skin. If you aren't stripping all of it off every morning and night, your skin won't feel the need to go bonkers and overproduce its own oils, which is where that "greasy" feeling comes from.
I won't lie, oil cleansing takes a bit more time than regular face wash, but it feels so good and your skin will be so happy afterward. Well, probably. It doesn't work for everyone, but different oils have different properties, and if a certain blend isn't working for you, another one might do much better.
Castor oil is used to pull things (like blackheads) out of the skin and dissolve dirt. It's a fairly heavy oil, so if you use only castor oil, it's going to be hard to get off your face. That's why most people cut it with a lighter oil, such as olive oil, which helps to dissolve makeup as well as making it much easier to remove the oil blend with a wet washcloth.
I have combination skin, so parts of it are dry and parts are oily. My personal blend consists of (approximately, because I don't measure) 50% castor oil, 40% olive oil, and the remaining 10% is varying amounts of jojoba, grapeseed, and sweet almond oil. I also put in a couple of drops of lavender essential oil for smell and its antiseptic properties. I massage this into my skin for a few minutes (or longer if I'm zoned out and watching TV or something while I do it), then I wet a washcloth under hot water, wring it out, and lay it on my face. This is possibly the most relaxing thing on the earth. Then I gently wipe off the oil and, if my face feels a little dry afterward, pat on a few drops of jojoba or sweet almond oil.
This worked beautifully for me all winter, but over the summer my blend was too heavy and I stopped using it. Now that it's starting to cool off again, I broke out the oils and have started it back up. I wish I had never stopped! My skin looks better and my breakouts are under control, and the scarring on my cheeks has lightened considerably. I also find that these oils last so long and have so many other uses, I feel like I'm saving money over buying a little $8 bottle of Neutrogena or whatever. It's a larger upfront cost to buy the oils, but I think it's a good investment.
There are tons of resources available via Google if you want to figure out which oils work for which problems. A bit of searching found me this thread about essential oils and their properties from a forum apparently called Essential Day Spa or something.
If you give this a try, let me know how it works out for you! I cleaned out the bathroom closet today and found an old bottle of Sea Breeze astringent and I can't believe I ever put that stuff on my face. The smell of it makes my soul cry.
Subscribe to:
Posts (Atom)